Customizing the HoneyBook pipeline
Introduction
One of my favorite features of the HoneyBook CRM is the Pipeline. After all, this is one of the first places I go every time I log into my acccount. Why? Because it gives me the birds-eye-view my business needs in order to help me get in and get out of the administrative tasks required to operate my full service agency.
While HoneyBook offers a solid default Pipeline, it's not a one-size-fits-all solution. Thankfully, HoneyBook allows for full customization, from renaming stages to adding new ones, ensuring your pipeline reflects your specific clientflow, industry, and operational needs.
In this blog, I'll show you how to customize your HoneyBook pipeline with a simple step-by-step guide, making it easier to fit the terminology and flow of your own business.
What is the HoneyBook pipeline?
Your project pipeline represents the lifecycle of your projects, providing a bird's eye view of their current status. You can even bulk-select projects within a certain stage for effortless follow-ups or check-ins.
Comprised of various stages, such as when a client signs a contract or makes a payment, it acts as a tracker for your business operations. At its core, the Pipeline gives you a comprehensive overview of everything, from inquiry to payments and offboarding. This automatic job tracking serves as your personal command center, reducing the legwork of tracking who’s who and what part of your process they’re in.
Steps to customize your pipeline
1. Review the default stages
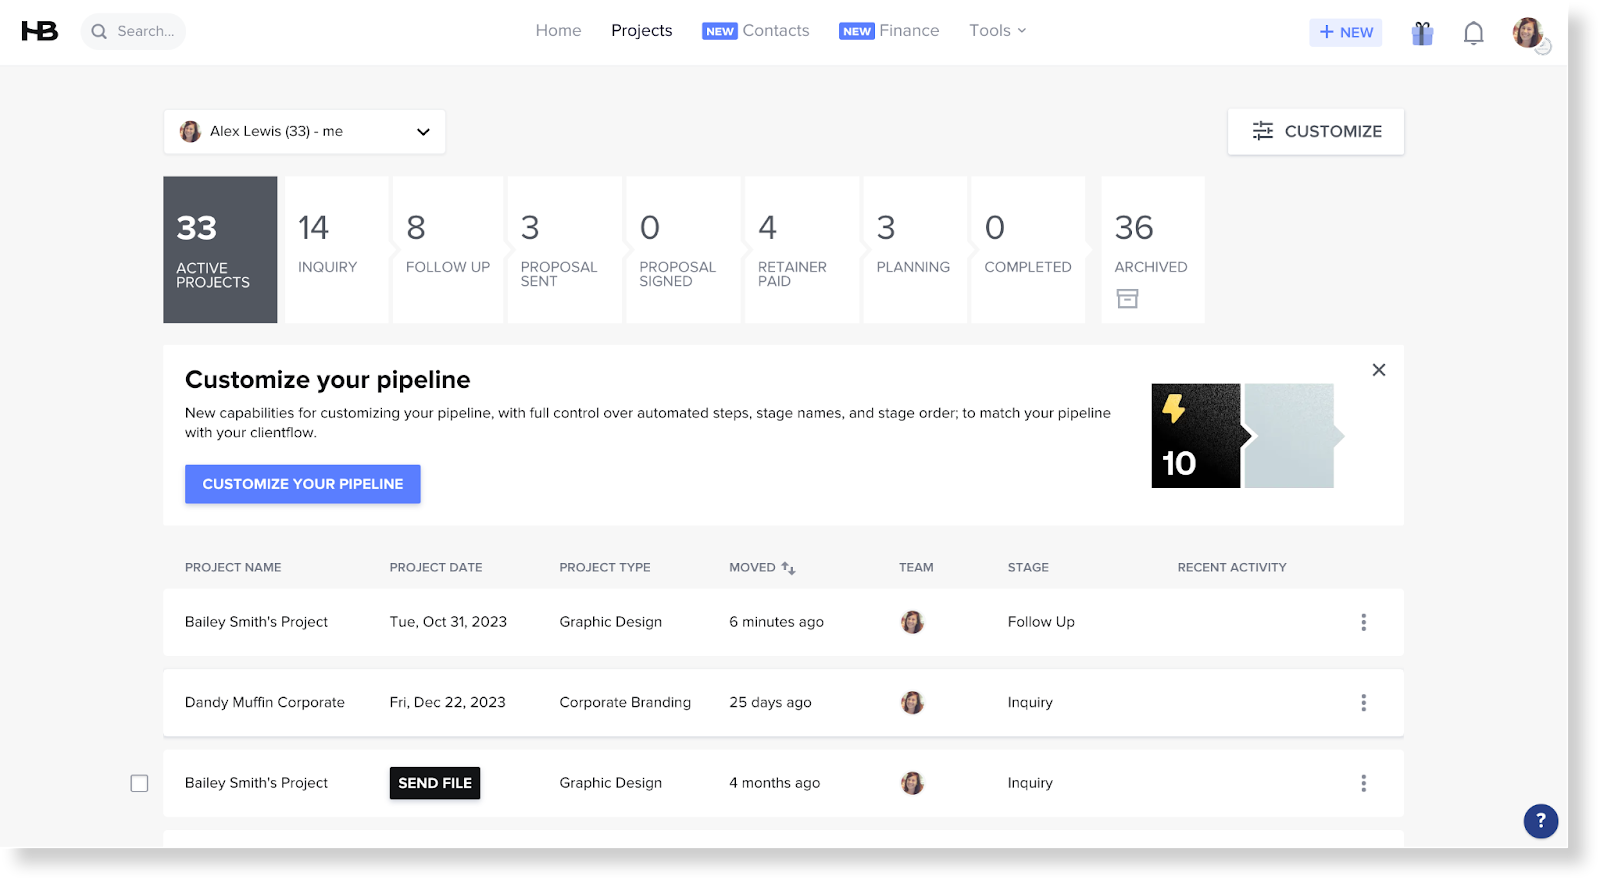
- Navigate to the Pipeline by selecting the Projects tab from the home navigation.
- Inside, you’ll see default stages such as Inquiry, Follow-up, Proposal Sent, etc.
- With your clientflow in hand, assess these default stages and reflect on which ones align with your business model and how you sell and deliver services.
- Take note of the stages that could be tweaked or are missing from the process.

2. Customize your stages
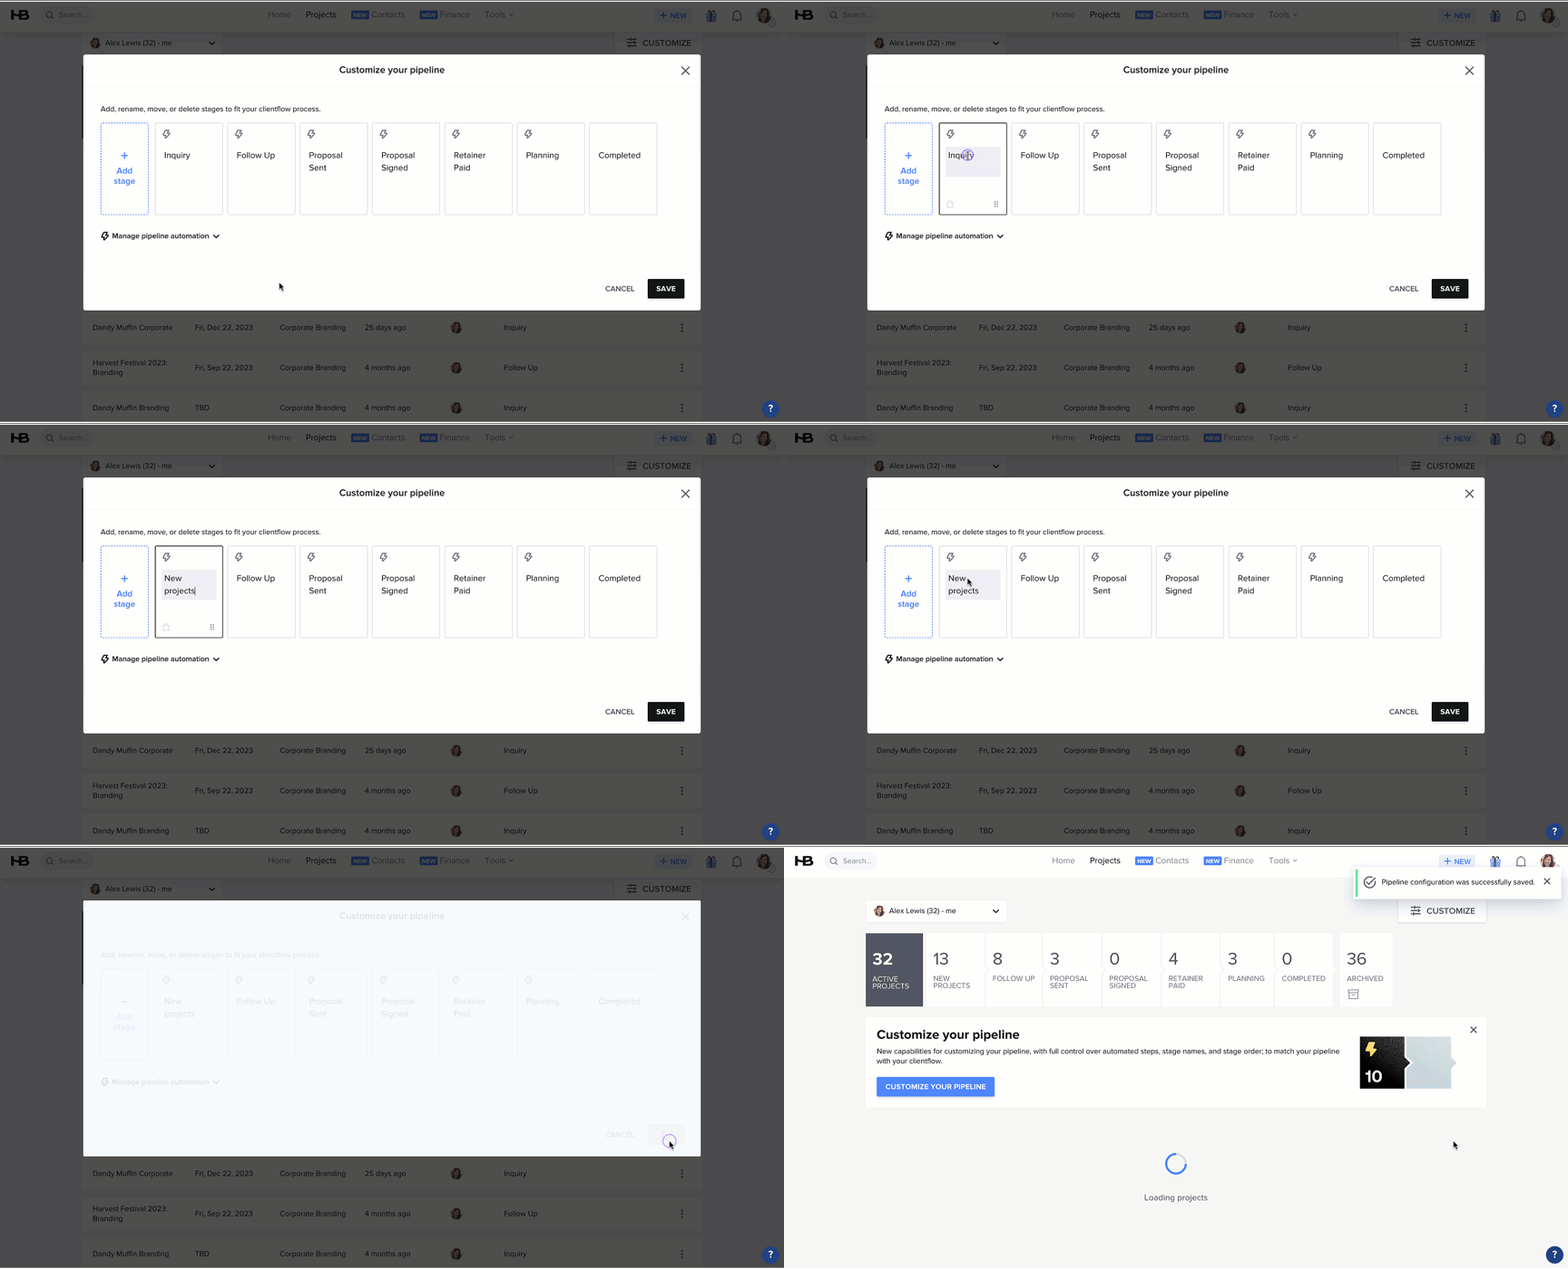
- Add Stages: Reflect unique parts of your service delivery to ensure no aspect of your clientflow is left untracked. For example, you might want custom stages for tracking projects to be scheduled, those confirmed for this month, and those happening this week. Note that you can add up to 20 custom stages, but less is often more for clarity.
- Rename Stages: Use terms that align with your business lingo and clientflow terminology. For example, change “Retainer Paid” to “Deposit Paid” if it suits your workflow better.
- Reorder Stages: Arrange stages to mirror the actual sequence of your clientflow, ensuring a logical progression from one phase to the next.
- Delete Unnecessary Stages: Remove stages that do not apply to your clientflow to simplify your pipeline view.

3. Manage pipeline automations
Pipeline Automations make tracking inquiries, leads, and active projects a breeze.
Here’s how to customize them:
- Navigate to the Customize button and then click ‘Manage pipeline automations’ to open the drop-down.
- The stages with a lightning bolt icon are connected to an automation.
- From the editor, you can toggle each pipeline automation ON or OFF.
- Use the drop-downs to select the pipeline stage that each action will automatically move into, such as when a client signs a contract or makes an initial payment.
Putting it all together
Customizing your HoneyBook pipeline is a powerful way to optimize how you track projects. It not only provides a visual overview of where each project stands but also facilitates better decision-making regarding marketing, client onboarding, and service delivery.
Here's a sample of my own Pipeline inside my HoneyBook account:

How to take action today
Now it’s your turn to decide whether to customize your pipeline to better match your own clientflow and or leave it on the default setting. Remember, there’s no wrong way to move forward. Once you’ve made your decision, follow the step-by-step instructions above!
Keep in mind that it might take some time to determine the best changes for your business. So, don’t rush to customize the pipeline until you have the data to support your decisions. Embrace the journey!


